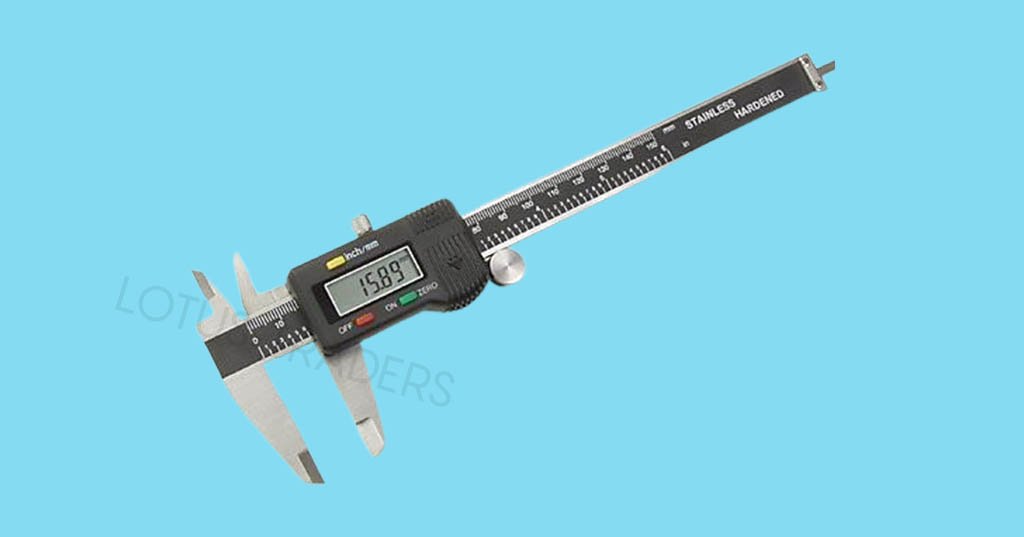
Features |
Specifications |
|---|---|
|
Resolution
|
0.01mm/0.0005”
|
|
Buttons
|
on/off, zero, mm/inch
|
|
Material of Construction
|
stainless steel
|
|
Minimum Order Quantity
|
1 Piece
|
Product Description - Digital Vernier Caliper
Digital Vernier Caliper Features:
- Automatic power off, move the digital unit to turn on power
- Battery Cr2032
- Data output
- Meets DIN862
- Optional accessory: data output cable
Technical Specifications of Digital Vernier Caliper:
| Model | Range | Accuracy |
| ZI 9036-A | 0-150mm/0-6” | ±0.03mm |
| ZI 9036-B | 0-200mm/0-8” | ±0.03mm |
| ZI 9036-C | 0-300mm/0-12” | ±0.03mm |
What is Digital Vernier Caliper?
Digital Vernier caliper also called digital caliper is a precision instrument that can accurately measure indoor/internal and outdoor/external distances. The digital vernier caliper requires a small battery, while the manual as a power supply.
The digital caliper is easier to use for measuring compared to an analogue/manual caliper. The measurement will be displayed and by pressing the inch/mm button we can read the distance in metric or imperial.
The material to be measured is placed between the outer grips/jaws and these are carefully joined. The locking screw is tightened to prevent the grips from separating and reading the screen. Distance can be read in metric and imperial by pressing the inch/mm button.
Digital vernier caliper takes linear measurements which is similar to an analogue calipers. The only difference is an additional LCD screen that automatically displays measurements without the need for user interpretation.
What is Digital Vernier Caliper Least Count?
A Digital vernier caliper can measure diameter, radius, length, to 1/10mm (0.1mm or 0.01cm), which is the least count.
What is a Digital Vernier Caliper used for?
Digital Vernier caliper is very popular instrument used in the following sector:
- Science Laboratories
- Medical Purposes
- Steel Industries
- Aerospace Industries
- Educational Sector
- Construction sector
How Digital Vernier Caliper Works?
The digital caliper can make measurements based on a series of capacitance sensors along the length of the beam bar.
These sensors then detect any changes in the electrical charge which occur during the changes in distance between the jaws.
Below the caliper scale are several rectangular plates etched into a strip of copper or glass.
There is a circuit board at the bottom of the movable jaw. The copper plates form a network of capacitors.
As the cursor moves along the main scale, the rectangular plates will align and misalign, and the capacitance amount of electrical charge between the plates will change. Which then sends a signal to a chip in the caiper that generates readings that are displayed on the LCD screen.
How to use Digital Vernier Caliper
- External measurement with large jaws.
- Internal measurement with small jaws.
- Depth measurement with the depth gauge.
- Step / Pitch measurement with Calipers head.
- Differential measurement with any clamp and reset to zero.
Note : Remember that in order to obtain and maintain accurate readings from your digital calipers, you must keep them clean and free of contaminants such as dust, dirt, or metal shavings. When taking measurements to the thousandth of an inch or millimetre, these particles, when accumulating in the jaws of the caliper, can disrupt your readings and cause large errors. The same goes for the objects you measure. Also be sure to remove any dirt or debris from these.


